
Installing laminate flooring is a popular choice for homeowners due to its affordability, durability, and ease of maintenance. However, one often-overlooked yet critical component of a successful laminate installation is the underlayment. This layer plays a vital role in enhancing comfort, reducing noise, and protecting your floors from moisture and subfloor imperfections. Whether you’re a DIY enthusiast or hiring a professional, understanding the basics of laminate underlayment installation is key to achieving a smooth, long-lasting result.
Here’s everything you need to know about laminate underlayment, including its purpose, types, and step-by-step installation tips.
1. What Is Laminate Underlayment?
Laminate underlayment is a thin layer of material installed between the subfloor and the laminate flooring. It serves several important functions:
- Cushioning: Provides a softer feel underfoot.
- Moisture Barrier: Protects against moisture damage, especially on concrete subfloors.
- Sound Reduction: Minimizes noise from footsteps and movement.
- Subfloor Smoothing: Compensates for minor imperfections in the subfloor, ensuring a flat surface for the laminate.
2. Types of Laminate Underlayment
Choosing the right underlayment depends on your subfloor type, budget, and specific needs. Here are the most common options:
1. Foam Underlayment
- Best For: General-purpose use on dry, level subfloors.
- Pros: Lightweight, affordable, and easy to install.
- Cons: Limited moisture protection; not ideal for uneven or damp subfloors.
2. Cork Underlayment
- Best For: Adding warmth and sound insulation.
- Pros: Natural, eco-friendly, and excellent at absorbing impact noise.
- Cons: More expensive than foam; requires careful handling to avoid damage.
3. Rubber Underlayment
- Best For: High-traffic areas and soundproofing needs.
- Pros: Superior noise reduction and durability.
- Cons: Heavier and pricier than foam or cork.
4. Combination Underlayment (with Moisture Barrier)
- Best For: Concrete subfloors or areas prone to moisture.
- Pros: Combines cushioning with a built-in vapor barrier for added protection.
- Cons: Slightly more expensive but worth it for moisture-prone spaces.
5. Attached Underlayment
- Some laminate flooring comes with pre-attached underlayment, eliminating the need for a separate layer. While convenient, ensure the product meets your moisture and soundproofing requirements.
3. Tools and Materials Needed
Before starting the installation, gather these tools and materials:
- Laminate underlayment rolls or sheets
- Utility knife or scissors (for cutting)
- Tape measure
- Duct tape or moisture-resistant seam tape
- Straightedge or chalk line (for alignment)
- Safety gear (gloves, knee pads, etc.)
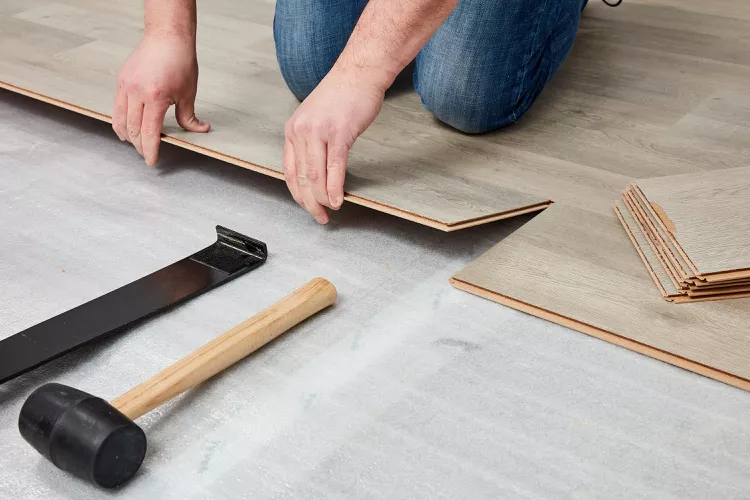
4. Step-by-Step Installation Guide
Step 1: Prepare the Subfloor
- Ensure the subfloor is clean, dry, and level. Remove debris, nails, or protruding objects that could damage the underlayment or laminate.
- For concrete subfloors, check for moisture levels using a moisture meter. If needed, apply a moisture barrier before laying the underlayment.
Step 2: Measure and Cut the Underlayment
- Roll out the underlayment across the room, perpendicular to the direction of the laminate planks.
- Use a utility knife or scissors to trim the underlayment to fit the room dimensions, leaving space around walls for expansion gaps (typically ¼ inch).
Step 3: Secure Seams
- Overlap seams by 2–6 inches, depending on the manufacturer’s instructions.
- Seal the seams with duct tape or moisture-resistant seam tape to prevent shifting and ensure a continuous barrier.
Step 4: Avoid Overlapping Edges
- Do not overlap the underlayment where it meets walls or other vertical surfaces. Leave a small gap to allow for proper expansion of the laminate flooring.
Step 5: Install the Laminate Flooring
- Once the underlayment is in place, begin installing the laminate flooring according to the manufacturer’s guidelines. Start from one corner of the room and work your way across, staggering the planks for stability.
5. Tips for Success
- Check Compatibility: Always verify that the underlayment is compatible with your laminate flooring type. Some manufacturers recommend specific products.
- Mind the Thickness: Thicker underlayment isn’t always better. Excessive thickness can interfere with locking mechanisms or cause instability.
- Ventilation: Ensure proper ventilation during installation, especially when working with adhesives or combination underlayments.
- Follow Manufacturer Guidelines: Adhere to the recommendations provided by both the laminate and underlayment manufacturers for optimal performance.
6. Common Mistakes to Avoid
- Skipping the Underlayment: Even if your laminate claims to have an attached pad, additional underlayment may still be beneficial for soundproofing or moisture protection.
- Improper Seam Taping: Failing to seal seams can lead to moisture infiltration and uneven flooring.
- Overlooking Subfloor Prep: A poorly prepared subfloor can compromise the entire installation, regardless of the underlayment quality.
7. Maintenance After Installation
Once your laminate flooring and underlayment are installed, maintain them properly to extend their lifespan:
- Clean spills immediately to prevent moisture seepage.
- Use furniture pads to avoid scratching the laminate surface.
- Avoid excessive water exposure, even with a moisture barrier in place.
Final Thoughts
A high-quality laminate underlayment is the unsung hero of any successful flooring project. By providing cushioning, moisture protection, and sound absorption, it ensures your laminate floors look great and perform well for years to come. With proper preparation, attention to detail, and adherence to manufacturer guidelines, installing underlayment is a straightforward process that pays off in comfort and durability.
As someone who has tackled multiple flooring projects, I’ve learned that skipping corners on underlayment can lead to costly repairs down the road. So take the time to choose the right product and install it correctly—you’ll thank yourself every time you walk across your beautiful, squeak-free floors! 🛠️✨