
There’s nothing quite like the aroma and flavor of fresh herbs straight from the garden. But what happens when your herb garden is bursting with more basil, rosemary, or mint than you can use? Drying and storing fresh herbs is an easy and effective way to preserve their flavor, aroma, and nutritional benefits so you can enjoy them long after the growing season ends.
Whether you’re a seasoned gardener or a beginner, here’s a step-by-step guide to drying and storing your fresh garden herbs properly. With these tips, you’ll have flavorful herbs at your fingertips all year round.
Step 1: Harvest Your Herbs at the Right Time
Timing is everything when it comes to harvesting herbs. For the best flavor and potency:
- Harvest in the Morning: Pick herbs after the dew has dried but before the sun gets too hot—this is when their essential oils are most concentrated.
- Choose Healthy Plants: Select herbs that are free of pests, diseases, or damage.
- Cut Strategically: Use clean scissors or pruning shears to snip stems just above a leaf node (where leaves meet the stem). This encourages new growth.
Pro Tip: Avoid washing herbs until after they’ve been dried, as excess moisture can lead to mold during the drying process.
Step 2: Decide on a Drying Method
There are several ways to dry herbs, depending on the type of herb and your available resources. Here are three popular methods:
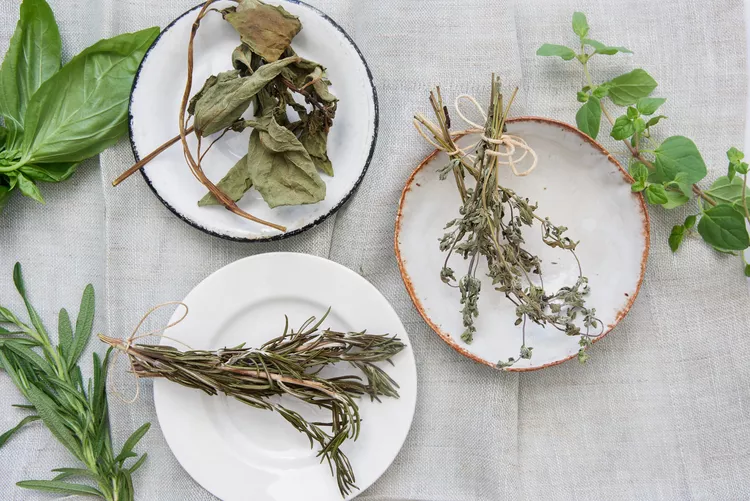
1. Air Drying
Best for: Hardy herbs like rosemary, thyme, oregano, sage, and lavender.
- How to Do It:
- Bundle small bunches of herbs together with twine or rubber bands.
- Hang them upside down in a warm, dry, well-ventilated area away from direct sunlight.
- Cover the bundles loosely with a paper bag to catch falling leaves and protect against dust.
- Allow 1–3 weeks for drying, depending on humidity levels.
2. Oven Drying
Best for: Softer herbs like basil, parsley, cilantro, and dill.
- How to Do It:
- Preheat your oven to its lowest setting (usually around 150–170°F or 65–75°C).
- Spread herbs evenly on a baking sheet lined with parchment paper.
- Place the tray in the oven and prop the door open slightly to allow moisture to escape.
- Check frequently and remove once herbs are brittle but not browned (about 2–4 hours).
3. Dehydrator Drying
Best for: Any type of herb, especially if you own a food dehydrator.
- How to Do It:
- Arrange herbs in a single layer on the dehydrator trays, leaving space between sprigs for airflow.
- Set the dehydrator to a low temperature (95–115°F or 35–45°C).
- Dry for 1–4 hours, checking periodically until herbs crumble easily.
Step 3: Test for Dryness
Herbs are fully dried when:
- Leaves crumble easily between your fingers.
- Stems snap cleanly rather than bending.
- There’s no lingering moisture or softness.
If any herbs feel damp, return them to the drying process to prevent mold.
Step 4: Store Your Dried Herbs Properly
Once your herbs are completely dry, it’s time to store them to maintain their quality and flavor.
1. Remove Leaves from Stems
For most herbs, strip the dried leaves from the stems by hand or using a fork. Discard thick stems, which don’t retain much flavor.
2. Crush or Leave Whole
- Crush leaves into smaller pieces for easier storage and quicker infusion into recipes.
- Alternatively, leave them whole if you prefer to crush them just before use for maximum freshness.
3. Choose the Right Containers
- Use airtight glass jars, spice tins, or vacuum-sealed bags to keep herbs fresh.
- Avoid plastic containers, which can trap moisture and alter flavors.
4. Label and Date
Clearly label each container with the herb name and date of drying. Most dried herbs retain their peak flavor for 6–12 months.
5. Store in a Cool, Dark Place
Keep herbs away from heat, light, and humidity, which can degrade their quality. A pantry or cupboard works perfectly.
Step 5: Alternative Storage Methods
If you want to preserve herbs differently, consider these options:
Freezing Herbs
- Chop fresh herbs finely and pack them into ice cube trays.
- Cover with olive oil or water, then freeze. Once solid, transfer cubes to freezer-safe bags.
- Great for herbs like basil, parsley, cilantro, and chives.
Infusing Oils or Vinegars
- Pack a sterilized jar with fresh herbs and cover with olive oil or vinegar.
- Let it sit for 1–2 weeks, then strain out the herbs.
- Perfect for adding depth to salad dressings, marinades, or sautés.
Making Herb Butter
- Blend finely chopped herbs with softened butter, roll into a log, and freeze.
- Slice off portions as needed for cooking or serving.
Tips for Success
- Dry Small Batches: Overloading drying spaces can lead to uneven results.
- Avoid Overdrying: Excessive heat or time can destroy delicate flavors and aromas.
- Repurpose Scraps: Use leftover stems to infuse broths or teas.
- Rotate Regularly: If air-drying, rotate bundles occasionally to ensure even drying.
Final Thoughts
Drying and storing fresh garden herbs is a rewarding way to extend the bounty of your garden and reduce food waste. With minimal effort, you can preserve the vibrant flavors of summer to enhance soups, stews, roasts, and more throughout the year.
As someone who loves having homegrown herbs on hand, I find this process both practical and satisfying. Plus, there’s something magical about opening a jar of dried lavender or rosemary in the middle of winter—it brings back memories of sunny days spent tending to my garden.
So grab your scissors, gather those fragrant sprigs, and get started! By mastering these simple techniques, you’ll have a pantry stocked with delicious, home-dried herbs ready to elevate your meals anytime inspiration strikes. 🌿✨