
If you’ve ever tried to remove wallpaper, you know it can quickly turn into a frustrating and time-consuming chore. But what if I told you there’s a way to make this task not only manageable but also surprisingly efficient? Using steam is one of the most effective methods for stripping wallpaper, and I’m excited to share my personal experience and step-by-step guide to help you master this technique.
Whether you’re dealing with stubborn adhesive, multiple layers of old paper, or delicate walls, a wallpaper steamer can be your best friend. In just six straightforward steps, you’ll have your walls looking fresh and ready for their next transformation. Let’s get started!
Why Steam is the Ultimate Solution
Before diving into the steps, let’s talk about why steam is such a powerful tool for wallpaper removal. Unlike water-based solutions that rely on soaking alone, steam penetrates deep into the wallpaper and adhesive, softening both simultaneously. This makes peeling off even the toughest layers effortless. Plus, steam is gentle on walls, reducing the risk of damage compared to harsh scraping or chemical removers.
I first discovered the magic of steam when tackling a particularly stubborn wall in my living room. The wallpaper had been there for decades, and no amount of soaking seemed to work. That’s when I decided to rent a wallpaper steamer—and it transformed the entire project. If you’re ready to experience the same success, follow these six steps.
Step 1: Gather Your Tools and Prepare the Space
The first step is all about preparation. You’ll need a few essential tools to get started:
- Wallpaper Steamer: You can either rent one from a local hardware store or purchase one if you plan to use it frequently.
- Scraper or Putty Knife: A wide-blade scraper works best for removing large sections of wallpaper.
- Drop Cloths or Plastic Sheeting: Protect your floors and furniture from drips and debris.
- Safety Gear: Wear gloves to protect your hands and goggles to shield your eyes from steam.
Once you’ve gathered your supplies, clear the room as much as possible. Remove furniture or cover it with drop cloths. Lay down plastic sheeting on the floor to catch any falling wallpaper or moisture. Trust me—I learned the hard way that skipping this step leads to a bigger cleanup later.
If your walls have electrical outlets or switches nearby, turn off the power to those areas as a safety precaution. It’s always better to err on the side of caution when working with heat and water.
Step 2: Fill and Heat the Steamer
Most wallpaper steamers come with a water reservoir that needs to be filled before use. Follow the manufacturer’s instructions carefully—usually, you’ll fill it with clean tap water up to the designated line. Once the steamer is filled, plug it in and let it heat up.
This is a great time to take a moment to review the steamer’s manual. Each model operates slightly differently, so understanding how yours works will save you time and frustration later. For example, some steamers have adjustable temperature settings, while others are designed to maintain a consistent level of heat.
While the steamer heats up, take a look at your wallpaper. If it has a glossy or vinyl coating, you may need to score it lightly with a scoring tool. This creates tiny perforations that allow the steam to penetrate beneath the surface. Be gentle here—you don’t want to gouge the wall underneath.
Step 3: Test the Steamer on a Small Section
Once the steamer is ready, test it on a small, inconspicuous area of the wall. Hold the steamer’s hot plate against the wallpaper for about 15-30 seconds, allowing the steam to soften the adhesive. Afterward, use your scraper to gently lift the edge of the wallpaper.
This testing phase is crucial because it helps you gauge how long the steam needs to work on your specific type of wallpaper. Some papers loosen almost instantly, while others require a bit more patience. During my project, I found that older wallpapers needed closer to 30 seconds of steaming, while newer ones came off after just 15 seconds.
Step 4: Work in Small Sections
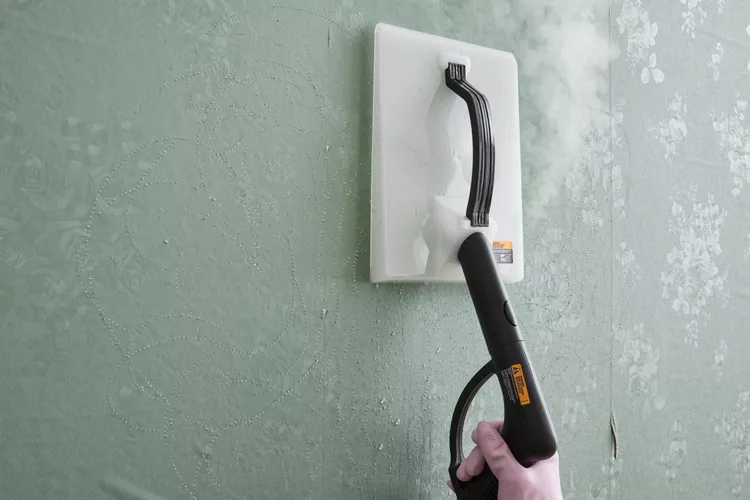
Now that you’ve tested the steamer, it’s time to tackle the rest of the wall. Start at the top of the wall and work your way down in manageable sections. Place the steamer’s hot plate against the wallpaper and hold it steady for the recommended time (based on your earlier test).
As the steam does its job, you’ll notice the wallpaper starting to bubble or loosen. Use your scraper to gently peel away the softened paper. Be careful not to apply too much pressure, as this could damage the drywall or plaster underneath. If the paper resists, reapply the steamer for a few more seconds.
Working in small sections ensures that the adhesive stays soft and pliable. It also prevents the wall from becoming overly saturated, which can lead to water damage. I made the mistake of trying to steam an entire wall at once during my first attempt, and it resulted in soggy patches that took forever to dry. Lesson learned!
Step 5: Address Stubborn Spots
Even with the power of steam, some areas may prove more challenging than others. Don’t worry—this is completely normal. For stubborn spots, try these tips:
- Reapply Steam: Sometimes, a second round of steaming is all it takes to loosen the adhesive.
- Use a Utility Knife: For corners or edges where the scraper won’t fit, a utility knife can help cut through tough spots.
- Be Patient: Rushing the process can lead to damaged walls, so take your time.
During my renovation, I encountered a few stubborn patches near the baseboards. By applying extra steam and using a putty knife at a shallow angle, I was able to remove the remaining paper without harming the wall.
Step 6: Clean Up and Inspect the Walls
Once you’ve removed all the wallpaper, it’s time to clean up and inspect your handiwork. Use a damp sponge or cloth to wipe down the walls and remove any leftover adhesive residue. If necessary, you can use a mild cleaning solution to ensure the surface is smooth and ready for painting or new wallpaper.
Take a close look at the walls for any signs of damage, such as dents or gouges. Minor imperfections can usually be repaired with spackling paste or joint compound. I always keep these materials on hand for touch-ups—they make a world of difference in achieving a polished finish.
Finally, dispose of the old wallpaper and clean your tools. Proper maintenance will extend the life of your steamer and ensure it’s ready for future projects.
Tips for Success
To make your wallpaper removal journey as smooth as possible, here are a few additional tips:
- Work Slowly and Carefully: Speed might seem appealing, but rushing can lead to mistakes or wall damage.
- Stay Organized: Keep your tools and supplies within reach to avoid unnecessary interruptions.
- Ventilate the Room: Steam can create a humid environment, so open windows or use fans to circulate air.
- Take Breaks: Wallpaper removal can be physically demanding, so listen to your body and rest when needed.
Final Thoughts
Removing wallpaper using steam is a game-changer. With the right tools and approach, what once seemed like an overwhelming task becomes manageable and even enjoyable. I’ve used this method in multiple rooms of my home, and each time, I’m amazed at how efficient and effective it is.
By following these six simple steps, you’ll have your walls stripped and ready for their next transformation in no time. Whether you’re planning to repaint, add new wallpaper, or simply refresh the space, steam-powered removal sets the stage for a flawless finish. So grab your steamer, roll up your sleeves, and get to work—you’ve got this!