
There’s nothing quite as frustrating as feeling a chilly breeze in your home when it’s supposed to be cozy and warm. If you’ve ever wondered why your house feels drafty despite your best efforts to seal it up, you’re not alone. As someone who has dealt with drafty rooms firsthand, I can tell you that pinpointing the source of the problem is half the battle. Thankfully, contractors and home improvement experts have shared their insights on the most common culprits—and how to fix them fast.
In this article, I’ll walk you through ten reasons your home might feel drafty and provide actionable solutions to help you tackle each issue. Whether you’re looking to save on energy bills or simply want to make your space more comfortable, these tips will guide you toward a warmer, more efficient home. Let’s dive in!
1. Old or Poorly Fitted Windows
Windows are one of the biggest culprits when it comes to drafts. Over time, seals around windows can wear out, allowing cold air to seep in. If your windows are older, they may also lack proper insulation.
How to Fix It:
- Caulk Gaps: Use weatherstripping or caulk to seal gaps around window frames.
- Install Window Insulation Film: This transparent film creates an additional barrier against drafts.
- Upgrade to Energy-Efficient Windows: If your budget allows, consider replacing old windows with double- or triple-pane options.
During my own home renovation, I discovered that adding weatherstripping to my living room windows made a noticeable difference in temperature control. It was a quick and affordable fix that paid off immediately.
2. Cracked or Missing Weatherstripping
Weatherstripping is designed to seal gaps around doors and windows, but it doesn’t last forever. Cracks, tears, or missing strips can let drafts sneak into your home.
How to Fix It:
- Inspect All Doors and Windows: Check for worn or damaged weatherstripping and replace it as needed.
- Choose Durable Materials: Opt for high-quality silicone or rubber weatherstripping for long-lasting results.
I learned the hard way that neglecting weatherstripping can lead to higher heating bills. Replacing it was a simple task that took less than an hour per door but had a big impact.
3. Gaps Around Doors
Even small gaps under or around doors can let in significant amounts of cold air. Exterior doors are particularly prone to this issue, especially if they’re older or improperly installed.
How to Fix It:
- Install Door Sweeps: These attach to the bottom of doors and block drafts effectively.
- Use Draft Stoppers: Fabric draft stoppers are a temporary solution for interior doors.
- Adjust Door Frames: If the gap is due to misalignment, consider hiring a contractor to adjust the frame.
When I added door sweeps to my front and back doors, I noticed an immediate reduction in drafts. Plus, it gave me peace of mind knowing I wasn’t wasting heat.
4. Leaky Attic Hatches
Attic hatches often go overlooked, but they can be a major source of drafts. If the hatch isn’t insulated or sealed properly, warm air escapes, and cold air enters.
How to Fix It:
- Add Weatherstripping: Apply adhesive-backed weatherstripping around the hatch opening.
- Insulate the Hatch Cover: Attach foam board or fiberglass insulation to the attic side of the hatch cover.
- Seal with Caulk: For extra protection, caulk around the edges where the hatch meets the ceiling.
This was one of the easiest fixes I tackled during my energy audit, and it made a surprising difference in keeping my upstairs warmer.
5. Uninsulated Walls
If your walls lack adequate insulation, they can allow cold air to penetrate from outside. This is especially common in older homes or those with hollow walls.
How to Fix It:
- Blow-In Insulation: Hire a professional to inject insulation into wall cavities without tearing down drywall.
- Check for Gaps: Look for areas where wiring or plumbing enters the walls and seal them with expanding foam.
- Upgrade Insulation: Consider adding new insulation during renovations or remodeling projects.
While this solution requires more investment upfront, improving wall insulation has long-term benefits for both comfort and energy savings.
6. Chimney Flues Left Open
An open chimney flue acts like a giant vacuum, sucking warm air out of your home while letting cold air in. Even if you don’t use your fireplace often, an unsealed flue can wreak havoc on your heating efficiency.
How to Fix It:
- Close the Damper: Always ensure the damper is closed when the fireplace isn’t in use.
- Install a Chimney Balloon: These inflatable devices block drafts when placed inside the flue.
- Seal Unused Fireplaces: For fireplaces you no longer use, consider having them professionally sealed.
Closing my chimney damper regularly saved me money on heating costs and eliminated a persistent draft in my living room.
7. Recessed Lighting Leaks
Recessed lights (also known as can lights) can create holes in your ceiling, allowing warm air to escape into the attic. Many older models aren’t airtight, making them a hidden source of drafts.
How to Fix It:
- Switch to Airtight Fixtures: Replace old recessed lights with modern, airtight versions.
- Insulate Around Lights: Use fire-rated covers to insulate the area around existing fixtures safely.
- Hire an Electrician: If unsure, consult a professional to ensure safe modifications.
After addressing my recessed lighting leaks, I saw a noticeable improvement in my home’s overall warmth and energy efficiency.
8. Electrical Outlets and Switch Plates
Outlets and switch plates on exterior walls can let cold air seep through tiny cracks behind the faceplates. While it may seem minor, these small gaps add up over time.
How to Fix It:
- Install Foam Gaskets: Place foam gaskets behind outlet covers to block drafts.
- Seal with Caulk: Apply caulk around the edges of electrical boxes inside the wall cavity.
- Check Insulation: Ensure there’s proper insulation behind outlets on exterior walls.
Adding foam gaskets to all my exterior outlets was a quick and inexpensive fix that made a surprising difference.
9. Poorly Sealed Ductwork
Air ducts carry heated air throughout your home, but leaks or poor connections can cause warm air to escape before reaching its destination. This not only wastes energy but also contributes to uneven temperatures.
How to Fix It:
- Inspect Ducts for Leaks: Look for disconnected joints or visible damage.
- Seal with Mastic Tape: Use mastic tape or metal foil tape to seal leaks permanently.
- Insulate Ducts: Wrap exposed ductwork in insulation to prevent heat loss.
When I hired a technician to inspect my ductwork, we found several small leaks that were easy to repair. The result? Warmer rooms and lower utility bills.
10. Foundation Cracks and Gaps
Small cracks or gaps in your foundation can let cold air infiltrate your home at ground level. These issues are often invisible unless you know where to look.
How to Fix It:
- Fill Cracks with Sealant: Use hydraulic cement or epoxy to patch foundation cracks.
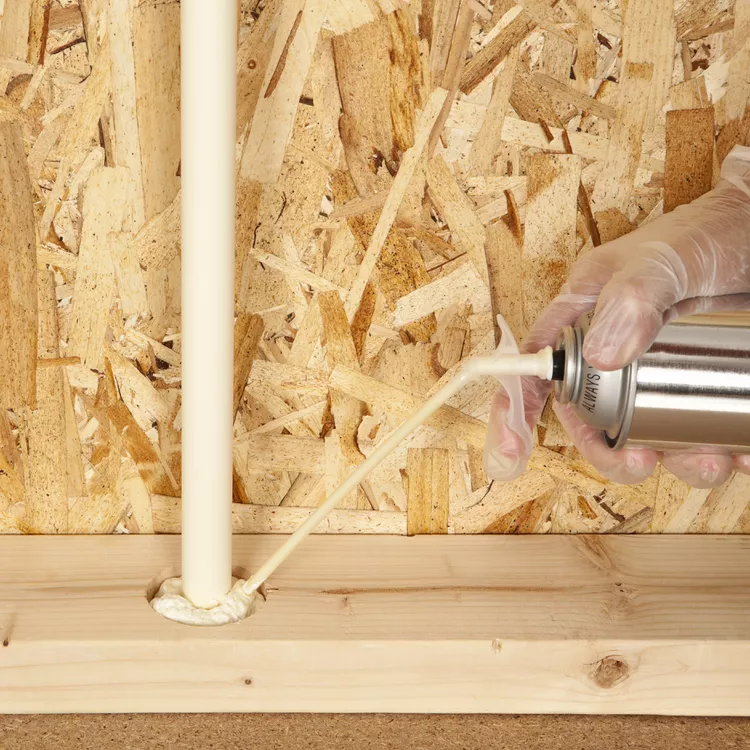
- Seal Gaps Around Pipes: Apply expanding foam around pipes and cables entering the foundation.
- Consult a Professional: For larger cracks, seek advice from a structural engineer or contractor.
Addressing foundation gaps in my basement helped eliminate drafts in my lower-level rooms and improved the overall comfort of my home.
Final Thoughts
A drafty home doesn’t have to be a permanent problem. By identifying the root causes and implementing these practical solutions, you can enjoy a cozier, more energy-efficient living space. From sealing windows and doors to insulating walls and ducts, every step you take brings you closer to a draft-free environment.
As someone who has tackled many of these fixes myself, I can attest to their effectiveness. Not only did my home become noticeably warmer, but I also saved money on heating costs—a win-win situation! So grab your tools, roll up your sleeves, and start making your home the cozy retreat it deserves to be. You’ll be glad you did!